

Hydraulic Claw
When I first got the box from Tinker Crate, I wanted my Dad to help me, because i didn’t know if it would be hard, and i was afraid of failing. But then a few weeks later, my Mom asked me if I was going to build the Claw. So i went to my room and set up a work space. I started by reading the instructions that came with the box, and then got all the materials for part A. I started building part A, which is where i build the hydraulic mechanism. But after i finished both of the pistons, it was time to fill the tube with water, and connect it to the pistons. I was supposed to fill the tube all the way, so there are no water bubbles. When I first tried, there were plenty of air bubbles in the tube, and big ones too. I thought I failed, but then I tried again, and it all worked out!!
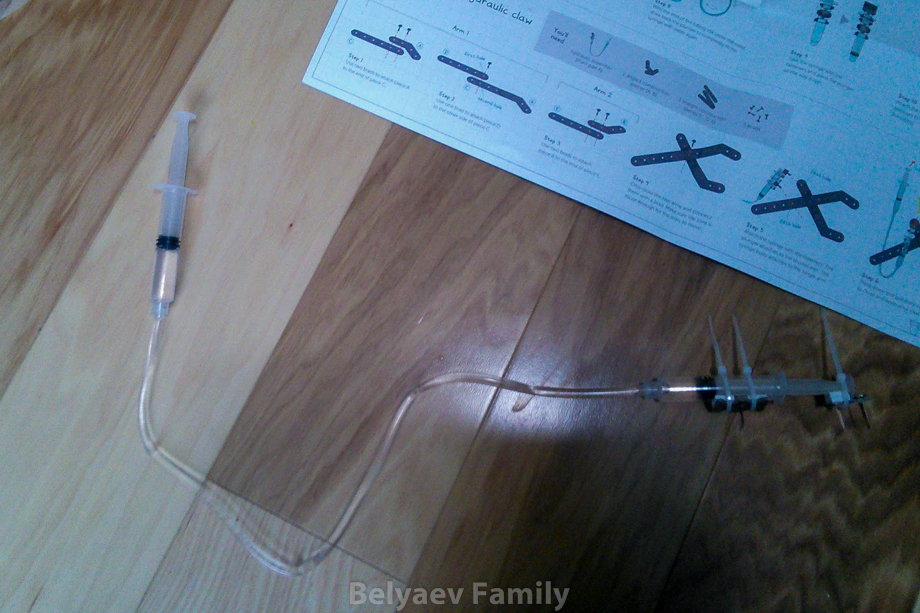 I was happy I finished part A. I went to show Mom, and she was proud of me. She told me to take pictures of how I make it, so I could make a blog about it. I took a picture of it, and went on to part B. Part B was the part in making the Jaws of the claw, the part that will go up and down when i use the piston. It was pretty easy, just connecting a few of the “Building Blocks” with some brads.

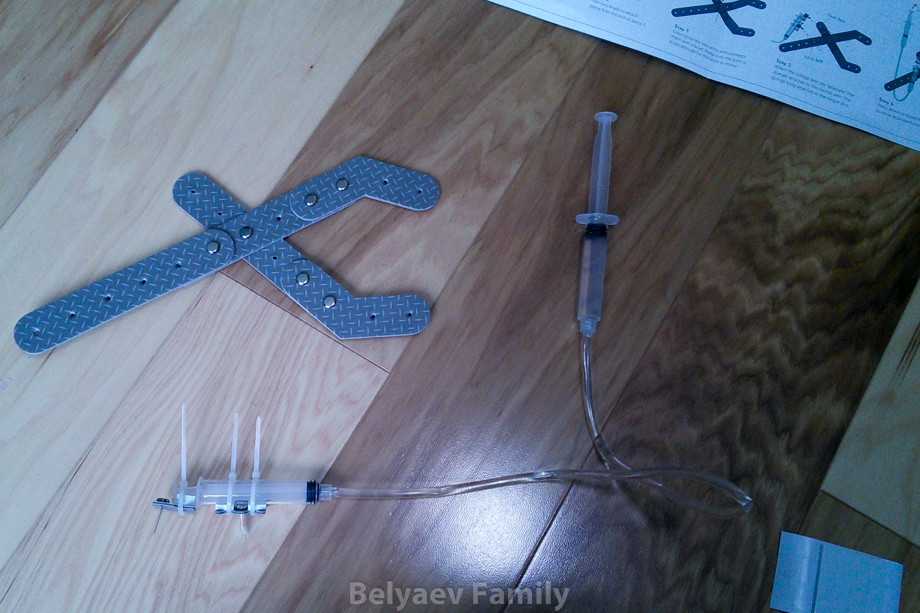
When I finished that, I took a picture, and went on to Part C. Part C is connecting ALL the parts. The Hydraulics to the jaws, to make the claw. This part was very easy. After I finished, I showed My Mom, and I also took a picture of what I created.
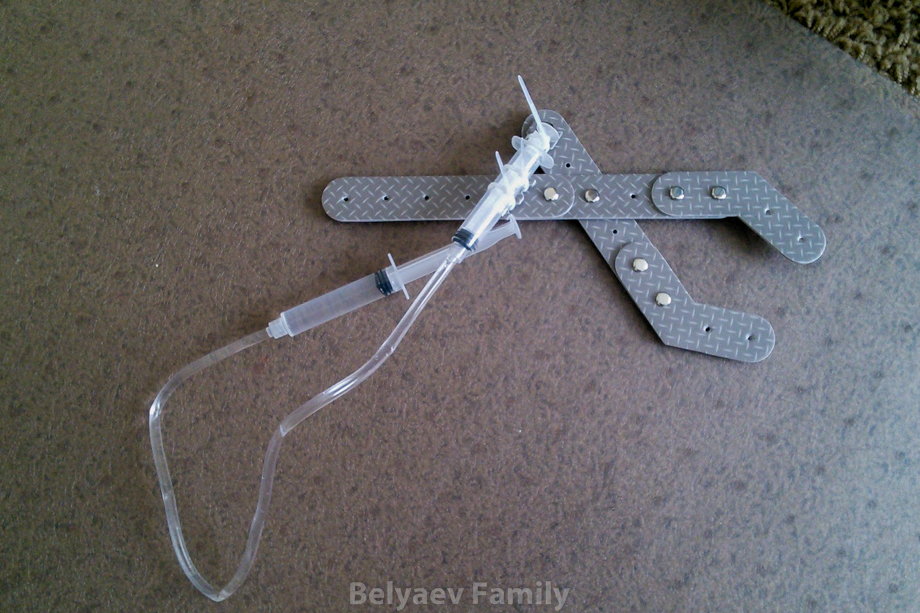
Then, because that is where the instructions end, I flipped the instructions to the back, and looked at the Image that was displayed. There were no directions to make what was displayed on the image, The claw connected to the box, with a mechanism to open the jaws, move the claw up or down, and to bring it forwards or backwards. So I tried making my own model, and it worked. I used their method to secure the claw to the box, but the other mechanisms were mine. I made 2 more hydraulics, and connected them to a control panel, which is the place where I had all the hydraulics end up, so i could easily control everything. Then I after I finished connecting it to the box, and all the mechanisms, I went down to show everybody. We went to the living room, and I tried picking up a shark stuffed animal with the claw, and it worked!
Fiber Optic Stars
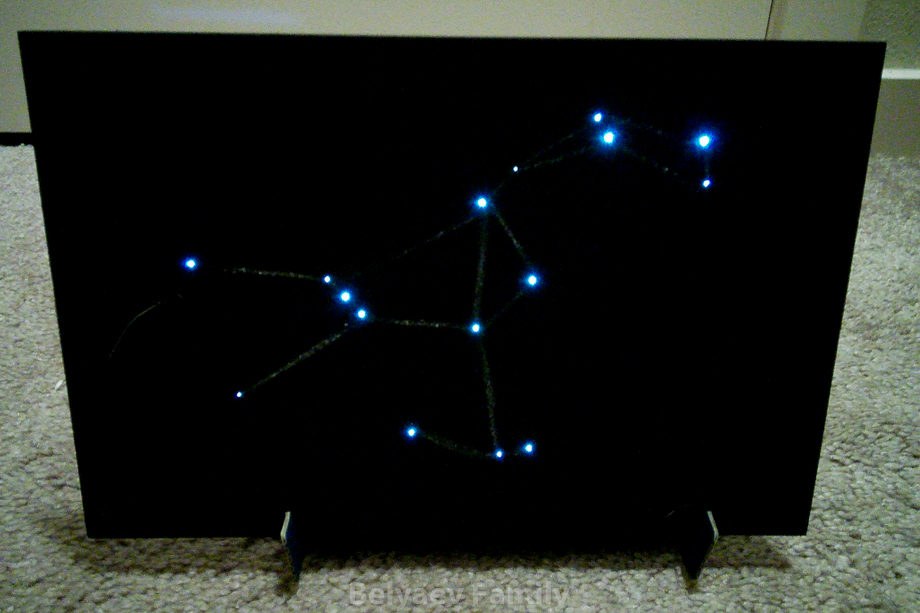
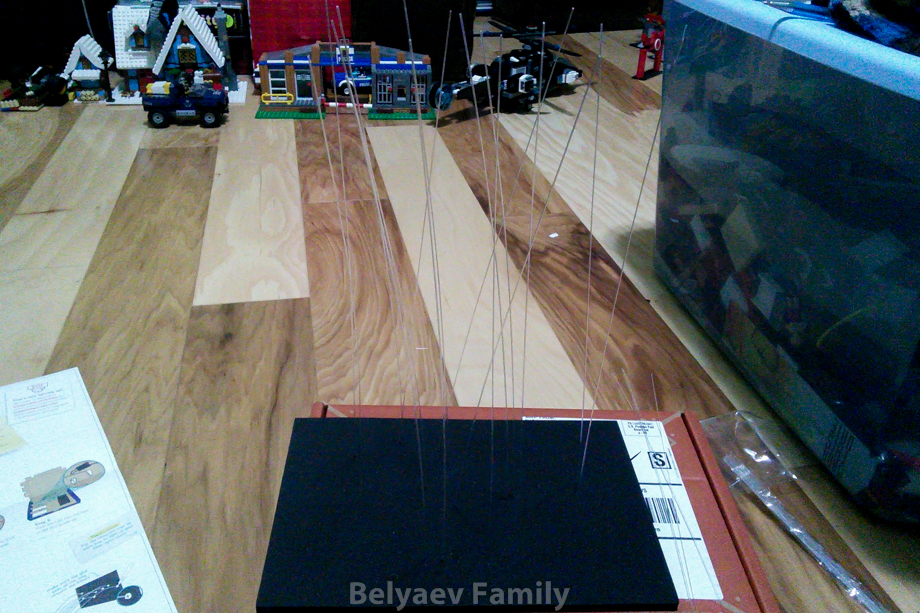
I got another box from Tinker Crate on May 2, and I wanted to build it on the weekends, when I have time. The first time I looked in the box, everything looked so complicated. When I saw Part A, I thought, “I will most likely need help, I am not that good with electronics.” There was a resistor, and I needed to make it shorter. There were also a few wiring things. But when I started making the project on May 6 (Saturday), I thought again “This is actually quite easy. I don’t think I will mess up on this one.” And it was true! I didn’t mess up with any part. After I finished Part A, which was cutting about 2cm off on each side on the resistor, and then connecting it to the red and black jumper cables. Then all that was left in part A was connecting it to the LED. Then I moved on to Part B, which was the Illuminator Box, and making it was very easy. All I had to do was fold a few pieces. Now, I would have done it all in one day, but I couldn’t, because in Part C, I had to make the stars, and to do that I had a constellation sheet, and I had to put the sheet on a piece of black foam that came in the box, and then I needed to poke holes through the constellations sheet, and onto the foam. After I poked the holes for my chosen constellation, which was Orion the Hunter, I connected all the holes with a white Crayon that came with the box, and then I was supposed to pull optical fibers through the holes, and glue the fibers to the foam on the back side. The glue was supposed to dry for 2 hours, and because I started the project around 9 PM, I couldn’t finish it that day, so I had to finish it May 7. After I finished putting the glue on, and while I was waiting for it to dry, I took a picture of the Foam, because the fibers looked like white pieces of hair.
Then the next day, after about 7-11 hours of drying, I got all the ends of fibers together, and made sure the ends were even, then I put them together using Zip Tie. I then glued the Zip Tie to the fibers, and glued the fibers together. I waited until glue was dry, and then put all of that in the Illuminator Box, and closed the box.
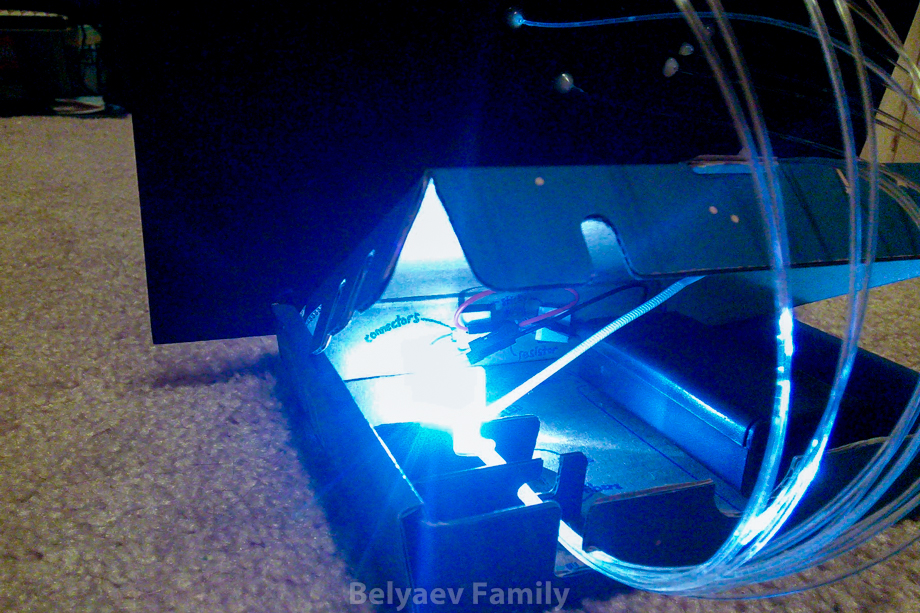
Then I turned the switch on, and it worked!! I then went down to show Mom, and she was happy. She told me to take it to a dark room and see how it lights up there.